
Only Organization Administrators and Class Administrators have permissions to edit all classes in the organization. Teacher users can edit only the classes they created themselves.
There are two ways to edit classes: in the Classes tab or by downloading a CSV of your student data, editing the Class column and re-uploading it.
If you edit classes in the Classes tab, then your students are able to keep their current password. If you use CSV import to edit classes then your students’ passwords will be changed.
To edit classes in the Classes tab:
- Go to My Organization.
- Click the Classes tab.
- Select the name of the class you wish to edit.
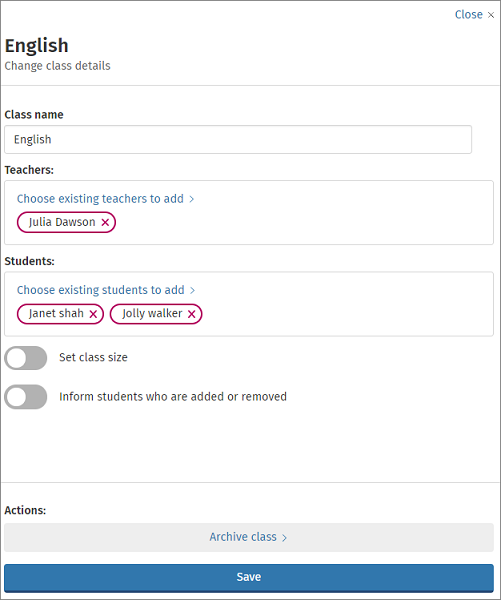
- Click Edit next to the class name.
- Use the Edit class window to change the class name, and to add or remove teachers and students to or from the class.
- Click Save to save any changes.
To edit classes using the CSV import:
- Archive any of your current classes that you are going to be editing
- Download a CSV of your student data:
- Go to My Organization
- Click the Students tab
- Select Add Students
- Click Import students
- Click on Download student data
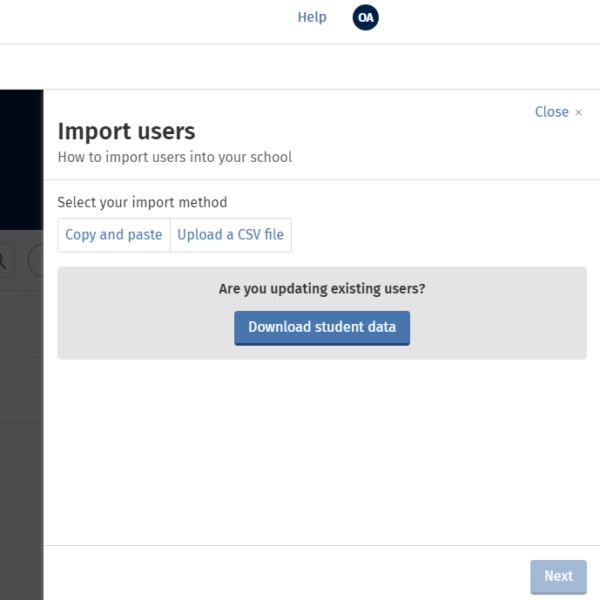
This will download a CSV of all the student data in your Organization. The Class column will be blank.
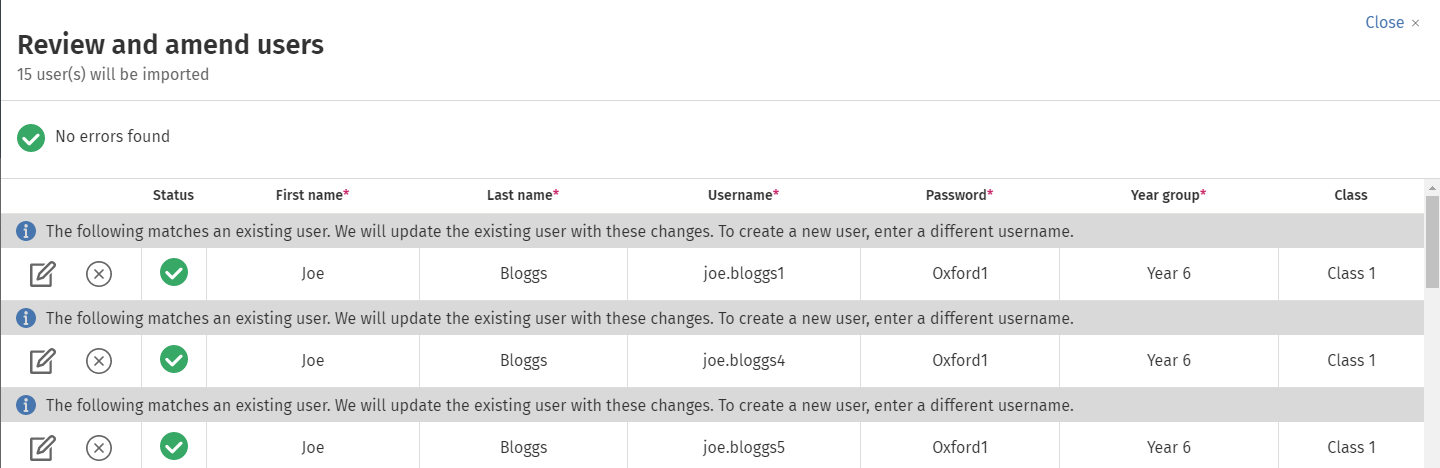
3. Add the students’ new class names to the classes column and click Upload a CSV, click Next and select the updated file from your computer
4. An overview of the students you are uploading will be presented, highlighting where there are any errors. You will see a message by each student telling you that their record is going to be updated:
5. Fix any highlighted errors and click Next.
6. Review your list of students, then click Import users.
7. You will receive an email to let you know if your import has been successful. Sign In cards for your students can be downloaded from this email.
8. Finally, add Teachers to your classes so that they can monitor and report on progress